Jest and RTL (React Testing Library) are the standard for testing React components as of 2024. Together they are pretty powerful for conducting all kinds of tests that require rendering and interacting with components.
However, have you ever been in a situation where your tests are failing and you don’t really know why?
I’ve been there multiple times, and in these situations, having a toolset of debugging possibilities usually helps me to overcome this quickly.
This articles focuses on a few tricks that are very easy to apply.
What we’ll be testing
The component is very simple:
import { useState } from "react"

const Counter = () => {
  const [count, setCount] = useState(0)
  return (
    <div>
      <p>Count: {count}</p>
      <button onClick={() => setCount(count + 1)}>Increment</button>
    </div>
  )
}

export default Counter
The corresponding test:
import { render, screen } from "@testing-library/react"
import userEvent from "@testing-library/user-event"
import Counter from "./Counter"

test("increments counter when button is clicked", async () => {
  render(<Counter />)
  const button = screen.getByRole("button", {
    name: /increment/i,
  })
  userEvent.click(button)
  expect(await screen.findByText(/count: 1/i)).toBeInTheDocument()
})
We’ll go through different ways to debug it in the following sections.
1. Using console.log() :)
The number 1 debugging technique of the web. Often times it is all you need.
const Counter = () => {
  const [count, setCount] = useState(0)

  console.log("Current count:", count)

  return (
    <div>
      <p>Count: {count}</p>
      <button onClick={() => setCount(count + 1)}>Increment</button>
    </div>
  )
}
2. screen.debug()
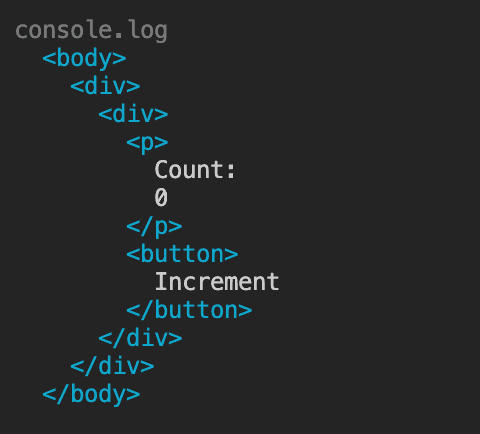
React Testing Library’s debug() method prints the component’s DOM structure, making it easier to understand what the rendered component looks like.
render(<Counter />)
screen.debug() // Outputs the current DOM structure
Outpus:
Print only targeted components
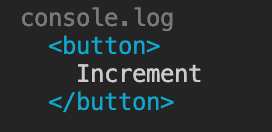
You can only print some elements of the DOM, by using the first argument of the screen.debug() function.
render(<Counter />)
const button = screen.getByRole("button", { name: /increment/i })
screen.debug(button) // print only the button
Outputs:
Print large components
Sometimes you may have a very large component, and the default character limit is not enough to print it whole. In that case use the second maxLength argument.
render(<Counter />)
screen.debug(undefined, 100000) // increase max length
screen.logTestingPlaygroundURL()
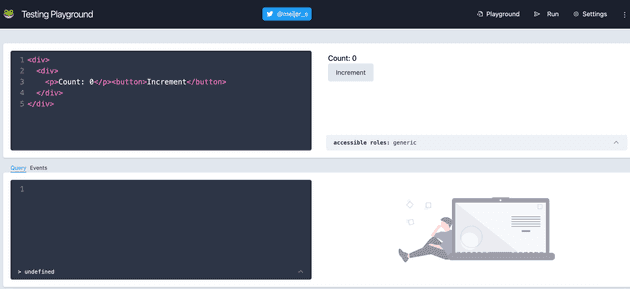
The last trick that I often resort to is using https://testing-playground.com/. This tool is integrated within RTL, and allows to view in a more interactive way how your component looks. It is especially useful to find out how to select certain elements.
render(<Counter />)
screen.logTestingPlaygroundURL()
This will log to the console:
Open this URL in your browser

    https://testing-playground.com/#markup=DwEwlgbgfKkwDlAwgewK4DsAuAuABAAzAD0iwARmllihlAJIYDGATgKYC2b2Jl1tMYuGglhUIA
If you open this link in the browser, you will see this page:
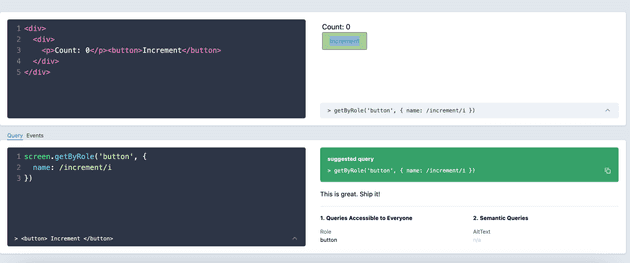
Not only it allows you to see the DOM, but also how it renders. If you click on any element in the preview, this tool will show you what is the best query to select it in the test:
And that is it for this short post. I hope these quick tips will help you with better debugging your React tests.


